Redis offers a free 30 MB cloud database through Redis Cloud. This service is provided by Redis Labs. It allows users to store their data in the cloud without the hassle of managing their own infrastructure. You don’t have to worry about commands and Linux VPS configuration.
In this tutorial, I will guide you to create and connect the free Redis cloud database from the Litespeed cache plugin installed on the WordPress website.
Table of Content,
While the 30 MB limit may seem small but it is suitable for small-scale projects and applications. I have tested it multiple times and concluded that a 30 MB size cloud database can easily support a simple WordPress blog with nearly 1000-1500 posts.
Understand the Requirements
- Your hosting plan must support the Redis object cache
- You will need to sign up for a free Redis account
It means, your hosting plan must support the object cache feature. In the case of Hostinger shared hosting, you must have a Business or Higher hosting plan. Hostingers business and higher hosting plans by default support only the Memcached object database.
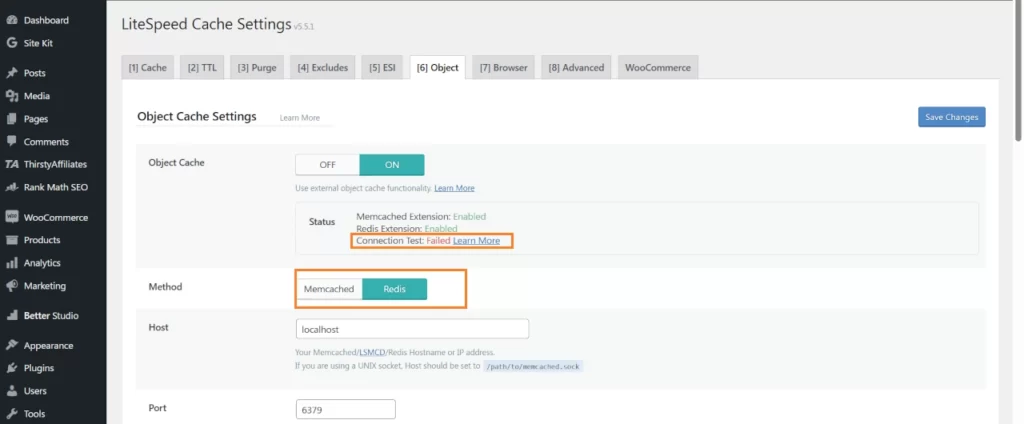
You can’t switch between Memcached and Redis object cache method settings. The setting option can be set to Redis but the connection will fail.
Here is the confirmation from the Hostinger support agent,
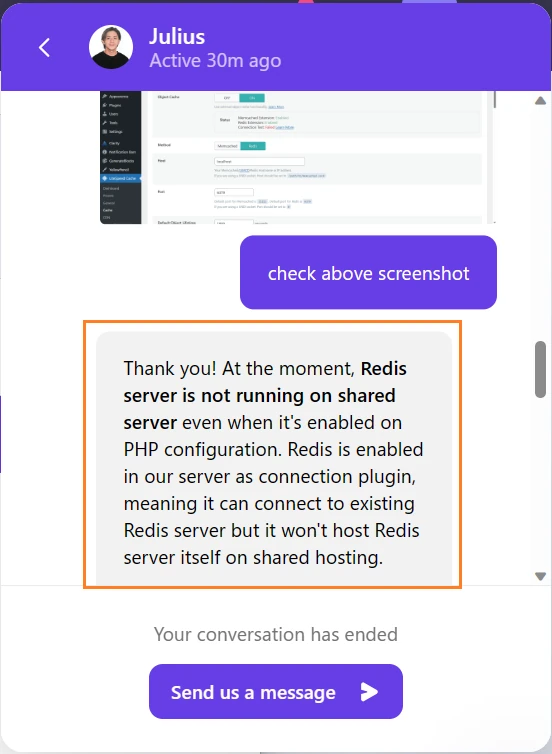
It says the Redis server is not running on the shared hosting server, even when it is enabled in the PHP configuration.
So we will simply connect the external Redis server through the active plugin, That’s it.
Steps to Connect Redis Database from Litespeed Cache Plugin
Let’s get started by creating a free Database on the Redis lab’s website.
Step 1: Create Redis Cloud-Free Database
Simply sign up for a Redis Cloud account, create a database, and start storing and retrieving data using Redis commands. Redis Cloud’s free 30 MB database is a convenient and cost-effective solution for exploring Redis’s capabilities.
- Go to: Try Redis Cloud and sign up by filling out forms
- You will get a confirmation email, click on the link given in it.
- Select a free plan and choose the desired location.
- Complete the signup process, and it will create a 30 MB free database.

Redis Cloud supports various cloud providers, including Amazon Web Services (AWS), Google Cloud Platform (GCP), and Microsoft Azure.
Step 2: Get Connection Credentials
To connect this database you will need to fill following credentials,
- Host address and port number
- Username and password key
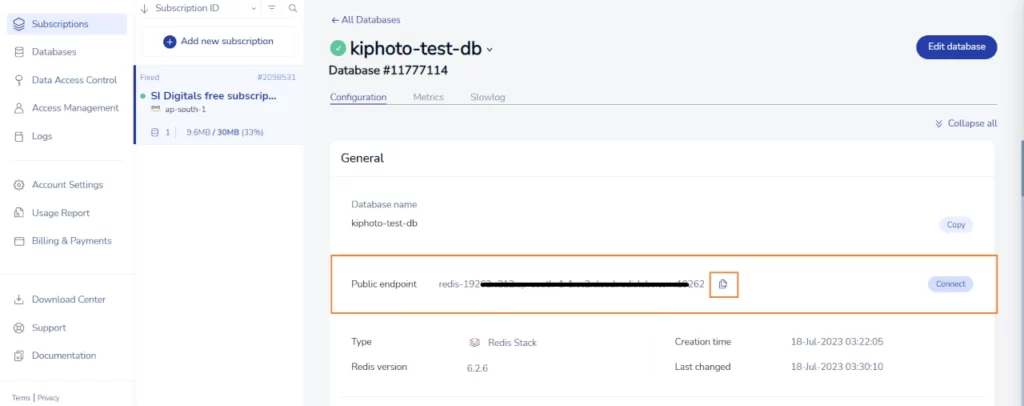
To get it, click on the name of the database “xxx-test-db”, as shown in the above screenshot.
It will open the database information page, this page contains all the needed information to feed into the Litespeed cache plugin.
Scroll down and note the public endpoint address, it will be your host address.
Again scroll down to the Security section and look for login credentials,
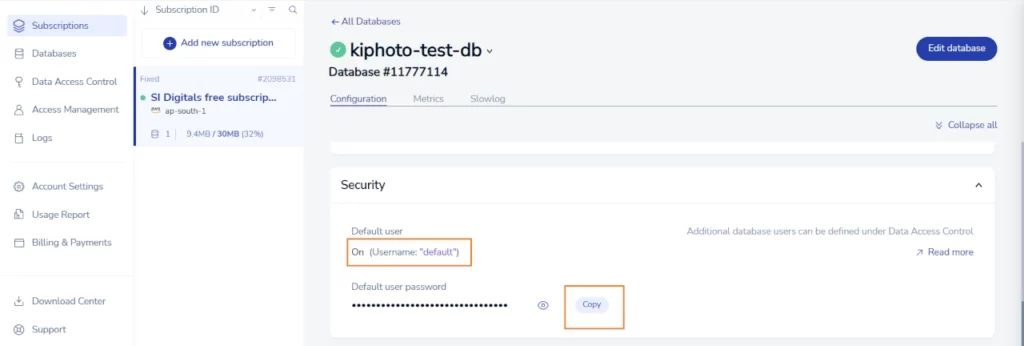
The user name is “default”, and copy the default user password.
Step 3: Connect Through Litespeed Cache Plugin
Now open the object cache setting and configure it in the Litespeed cache plugin with connection information copied in the previous step,
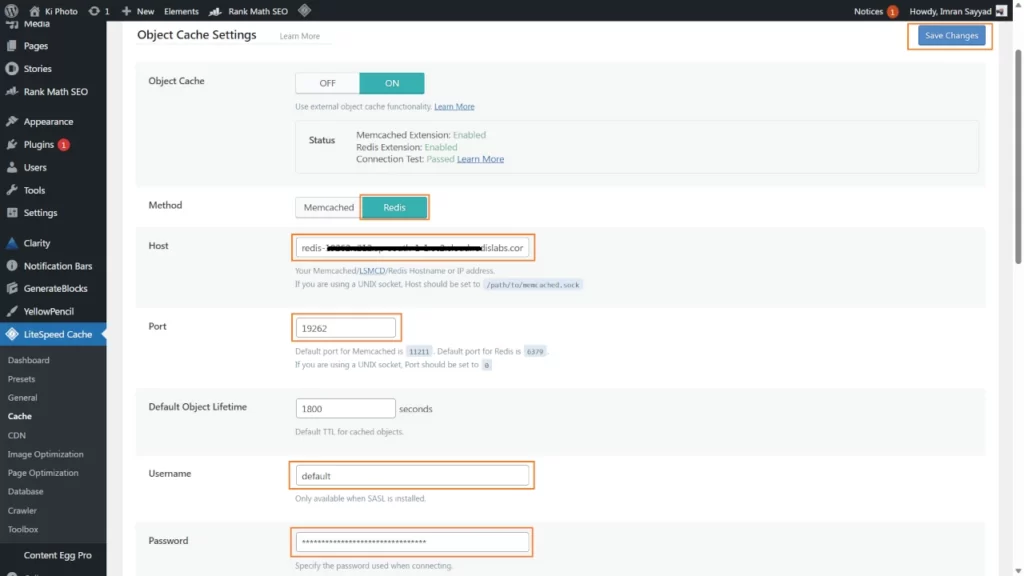
Click on the “Save Changes” button. After pressing save, the page will reload and the status should show all options in green. Especially “Connection test: Passed”. It means you have successfully connected to the Redis database.
How to Check Redis Database Size and Content.
You can log in to the Redis lab’s website from the apps page. There you can see the current database size in Megabytes.
To see the content being stored in the cloud database you will need Redies Insight module to be installed on your PC. You can download it from the download center option available on the Redis Labs account dashboard.
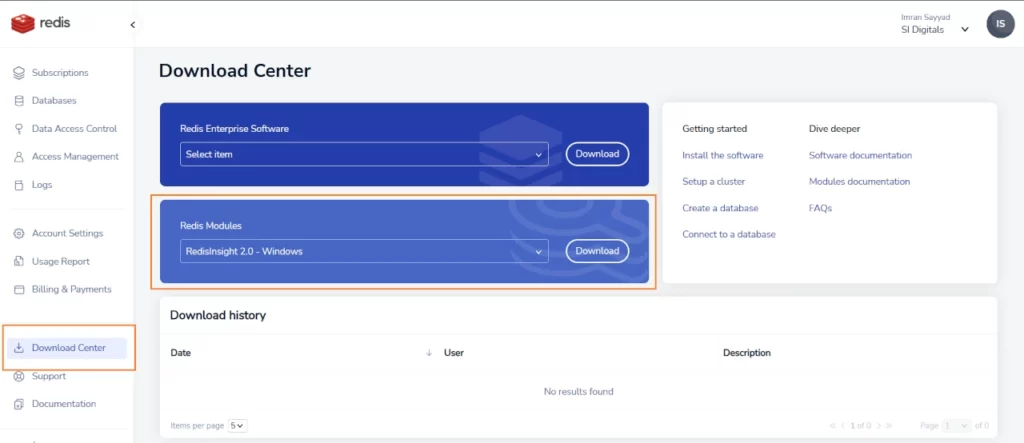
After downloading Redis Insight Module, install it on your computer. Then create and add the Redis database with the same host address and login credentials we used in the WordPress Litespeed cache plugin.
After successfully addition of the data base, you can see memory consumption and stored object cache keys along with their size and expiry.
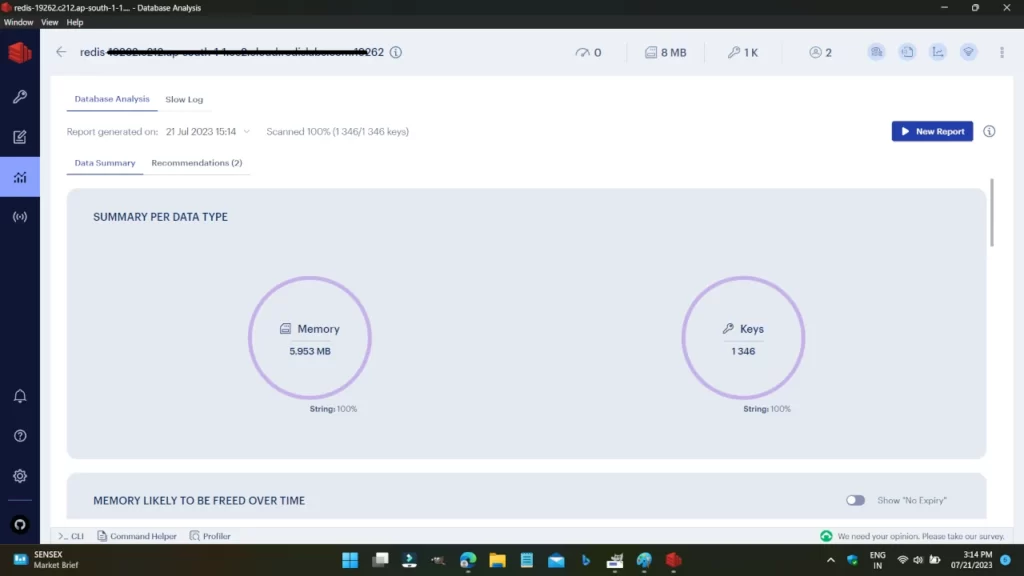
From here you can monitor how much memory is being consumed by your site’s object cache. You can upgrade it if your project gets bigger. There are plenty of scalable plans to upgrade.
The most important feature of Redis Cloud is that you can choose from different server locations worldwide. My recommendation is to store the Redis database closer to your web hosting server. So, the background communication between your hosting and the Redis server will be very fast.
In this way, you can connect to an external cloud object cache server. And so you won’t need any custom configured VPS hosting plan to take benefits of Redis Cloud Database.